30days-React-Native
准备工作
|
|
flex布局
|
|
在react-native中支持flexbox
|
|
克隆项目
|
|
index.ios.js
API
- AppRegistry是 JS 运行所有 React Native 应用的入口。
应用的根组件应当通过AppRegistry.registerComponent方法注册自己,然后原生系统才可以加载应用的代码包并且在启动完成之后通过调用AppRegistry.runApplication来真正运行应用。 TouchableHighlight 当按下的时候,封装的视图的不透明度会降低
同时会有一个底层的颜色透过而被用户看到,使得视图变暗或变亮。1234567891011renderButton: function() {return (<TouchableHighlight onPress={this._onPressButton}><Imagestyle={styles.button}source={require('./button.png')}/></TouchableHighlight>);},//TouchableHighlight只支持一个子节点NavigatorIOS 包装了UIKit的导航功能,可以使用左划功能来返回上一界面
- AppRegistry是 JS 运行所有 React Native 应用的入口。
路由
123456789101112131415//一个路由是用于描述导航器中一页的对象。render: function() {return (< NavigatorIOSinitialRoute={{component: MyView,title: 'My View Title',passProps: { myProp: 'foo' },}}/>);}//现在 MyView 会被导航器渲染出来。它可以通过route属性获得对应的路由对象,导航器本身,还有所有passProps中传递的属性。导航器
123456789101112var MyView = React.createClass({_handleBackButtonPress: function() {this.props.navigator.pop();},_handleNextButtonPress: function() {this.props.navigator.push(nextRoute);},...});//一个导航器对象包括如下函数://1. push( route ) - 导航器跳转到一个新的路由//2. pop() - 回到上一页
day1-计时器
一个IOS系统定时APP,功能与系统定时器一致。
将页面分为时间显示部分,控制部分,显示计次共三个部分。
每个部分独立渲染组件和样式。
实现的功能有:启动定时器,计次,停止,复位。
|
|
day2-天气预报
一个IOS系统的天气app,数据固定
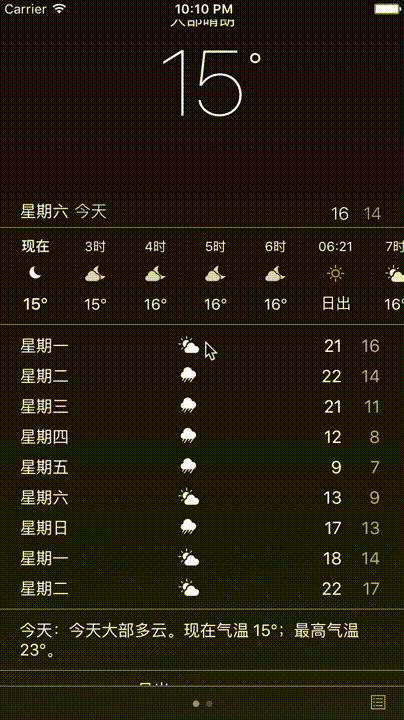
这一部分比较有难度的是对天气数据的展示处理。
以及滑动时的状态变化。
|
|
day3-Twitter开场动画
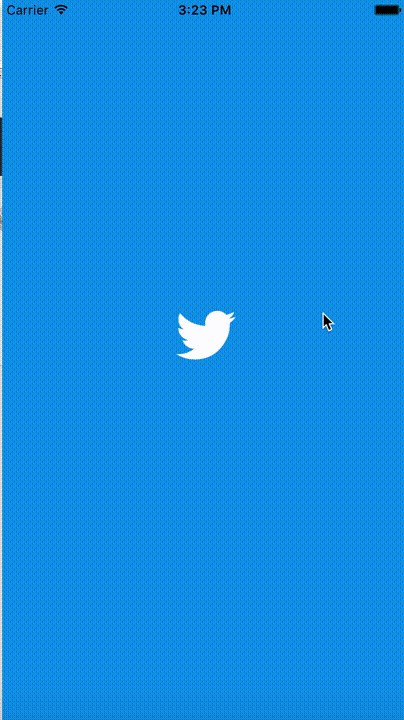
动画实现的思路是将中间的小图标放大,
|
|
以及下拉刷新状态的控制
|
|